Bored Panda old Shoes


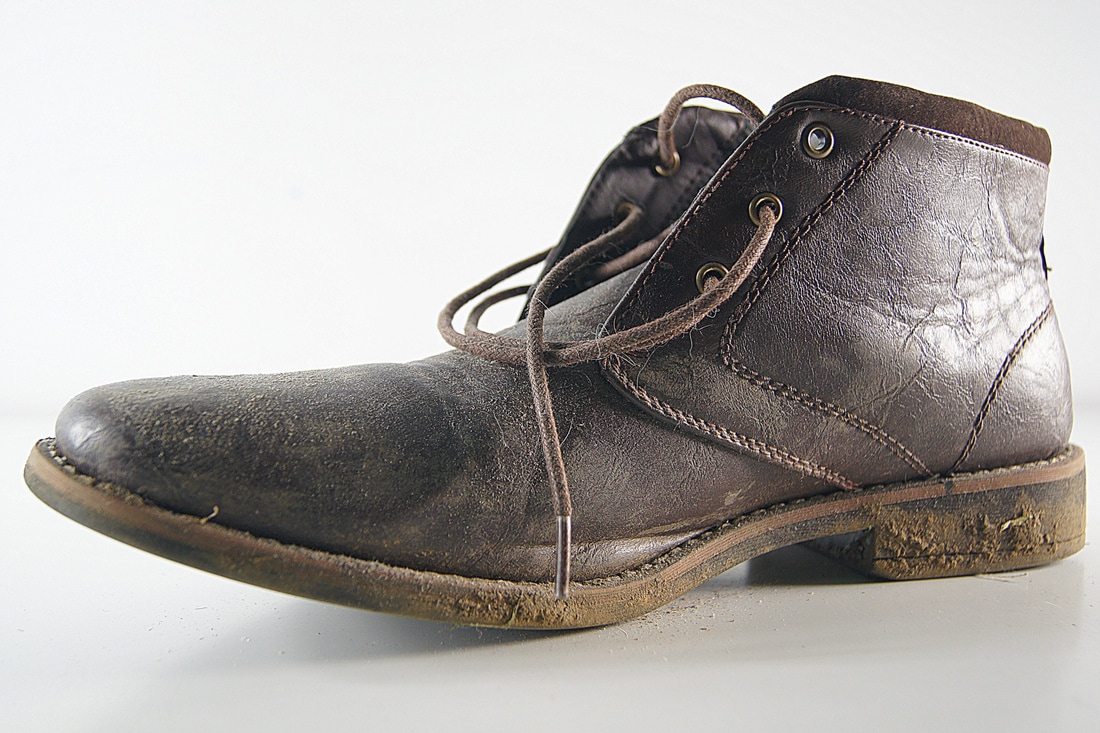
My favourite picture out of the three above is is the picture on the left. This is because the dust on the shoe makes it look more ruined and the incision in the shoe makes the shoe look more torn. The roughness of the shoe makes it look more aged. The extra dust on the buckle and web like look on the shoe makes it look ruined and well passed it's time. I would like the final piece to look similar to this however, I think that I would like to try using other types of shoes. The reason the picture is the best out of all of the picture is because of the character of the shoes, tells a story.
The other two aren't as good because they don't have as much dust or character. The shoes are less aged and therefore look less rustic. However I think that the style of the shoes are more detailed. The shoe on the right has a slight different shades and discolouration. This makes certain parts look more old and rusty in detail. However the shoe doesn't look so old but more detailed is expressed. Also the lighting makes parts of the shoes look more focused and creates shadow on the shoe. The back of the shoe is a different colour therefore makes the shoe look more aged,
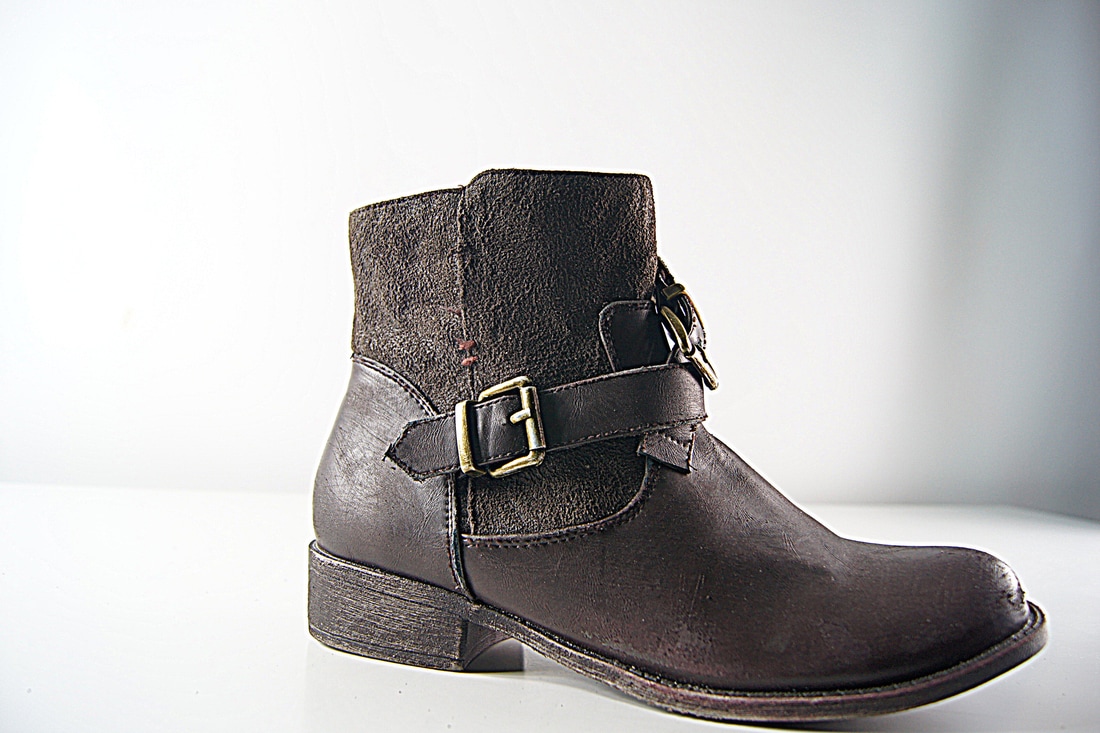
The middle is in between both styles. This is because there is some worn and torn on the back of the heel. an is a bit darker. It also has the detail on the strap. The lighting makes the shoe look older and more worn. I like this design because of the slant of the shoe. The dents on the shoe and the lines on the front of the shoe, therefore they express age and the story of what the shoe ha gone through.
The other two aren't as good because they don't have as much dust or character. The shoes are less aged and therefore look less rustic. However I think that the style of the shoes are more detailed. The shoe on the right has a slight different shades and discolouration. This makes certain parts look more old and rusty in detail. However the shoe doesn't look so old but more detailed is expressed. Also the lighting makes parts of the shoes look more focused and creates shadow on the shoe. The back of the shoe is a different colour therefore makes the shoe look more aged,
The middle is in between both styles. This is because there is some worn and torn on the back of the heel. an is a bit darker. It also has the detail on the strap. The lighting makes the shoe look older and more worn. I like this design because of the slant of the shoe. The dents on the shoe and the lines on the front of the shoe, therefore they express age and the story of what the shoe ha gone through.
Old shoes photography


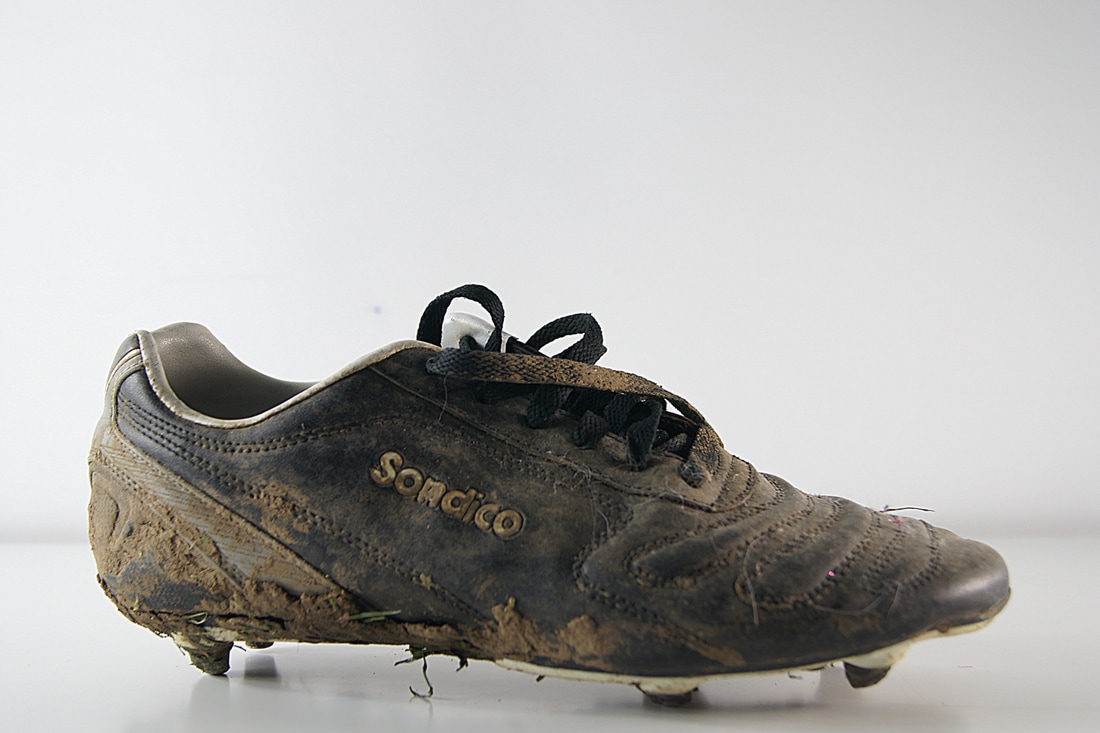
This is more similar to my picture as it's more focused on the wore and torn of the shoes. I like these photographs because because of the cuts and the lines on the shoes. The middle picture is the best out of the above. This is because of the placement of the shoes. An extra amount of detail with the laces. The discolouration of the shoes makes it the shoe have more of a story. The background is clear and therefore makes the main photo look more in focus.
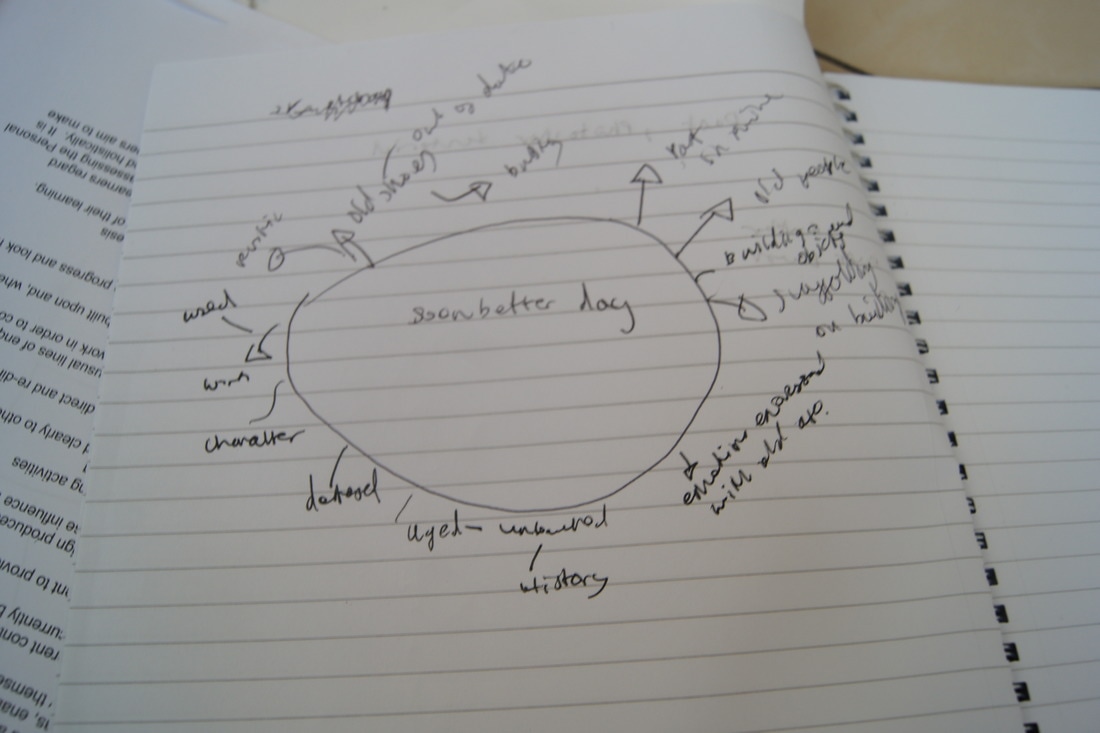
Mind Map
Sketches
Photoshoot 1/Practice
Before photoshop


The lighting of he pictures are good and the staging of the shoes are fine. The thing I would like to improve is to make the dust more prominent and make it more thick, so it is easily noticed. The way I would do this is by getting a more muddy shoe and mix the dust, to make the the shoe look more old and aged.
After doing some research, There some brushes that you can use to create more dust and make it looking more prominent. Also on photoshop I tried to use the invert function. It does make the shoe look more dusty, however it switches the background colour with the shoe colour which looks a bit weird.
After doing some research, There some brushes that you can use to create more dust and make it looking more prominent. Also on photoshop I tried to use the invert function. It does make the shoe look more dusty, however it switches the background colour with the shoe colour which looks a bit weird.
After Photoshop


The difference between before and after photoshop is the shoes are more crisp and the dust the dents in the shoes are more vividly seen. The improvements that could be made are the presentation and the style could be made better. the shoes used could be more worn and torn. Different types of styles of shoes such as boots, flats or high heels. Different colour shoes could be used to change the dynamic of the photoshoot. Different layer styles and high passes can be used. This was just a practice photoshoot. From this I learned that dust doesn't stick on shoes. So I decided to express 'seen better days' in a different light. The way is to express wore and tore of the shoe and the character through using different shoes.
Photoshoot 2


Above are the three best pictures from the photoshoot are above. This is because of the angle and the wore and torn that is seen from the mud and the lines on the shoes. This adds a different effect to the outcome of the shoe. The laces and the direction of the shoe tells a different image and story. My favourite picture out of the three would be the first picture on the left. This is because you can see the mud but the dust is much more prominent. The lighting of all the pictures above are the same but in some of the other pictures in the photoshoot there are more lights but the flood lights are good to light the picture.
Photoshoot 3


These are the best 3 photographs out of the whole photoshoot because of the composition and the lighting of the picture. These pictures express the worn and the torn of the shoe. This and the high pass makes the lines and the photos and the mud merged together makes the shoe have more character and story. The laces and the tore of the in the shoe adds character. This is because of the colour and the focus of the pictures is in one place. The lighting and composition is called flood lighting, this adds the photo have characters.
Photoshop tutorial
The first step is to go on filter and click other. This is shown above. You choose the correct high pass setting, that doesn't show any glow, other wise it will be over exposed. You choose the setting. Overlay is a more soft light if you want the details to be more vivid use hard light or vivid light. To get the details more in the picture use cmd right click to duplicate layer with high pass. This therefore leads to a more expression on the details and the mud. The final piece will look different to the original because as the creases and the lines will be more vivd.
Photoshoot 4
Best Photos


The three pictures above have all been edited differently. The lighting and the set up is the same. the different layer styles in each of the photos mean the amount of wore and tore shown is varied. I like the picture on the right because the sole of the shoe is more expressed than the other pictures. This gives the shoe a more rustic effect. The lighting and the background used makes the shoe the subject in all three pictures. the way the laces go across the shoe and the presentation of the shoe makes the picture look unique and stand out. However the style of the shoe is different to all other units. The shoe was easy to crease and distort because of the material. The colour was chosen specifically as the black shoe and laces really stands out against a white background.
Photoshoot 5
Best Photos


These pictures above are the best pictures because of the difference in presentation of the shoe, expressing from all angles that the shoe is worn. The layer styles like vivd light and hard light are the best for this because it over expresses and shows in more detail the lines inside the shoes. The way to get the shoes to look old in the first place is to use nail polish remover to remove the colour, then use sandpaper to cause lines and man made worn and torn. My favourite picture of the ones above is the middle picture because of the strap is more vividly shown this gives the shoe more character and story. This gives viewers more intake. Therefore allows the viewer to get a better feel for the subject. This is also the only girls shoes I used in the unit as it is much harder to find a broken but rustic women's pair of shoes.
Final Pieces